Basic Slouchie Beanie
designed by Kim Guzman © Sept. 2015
Please read my Terms of Use
Technique: Regular Crochet
Finished size
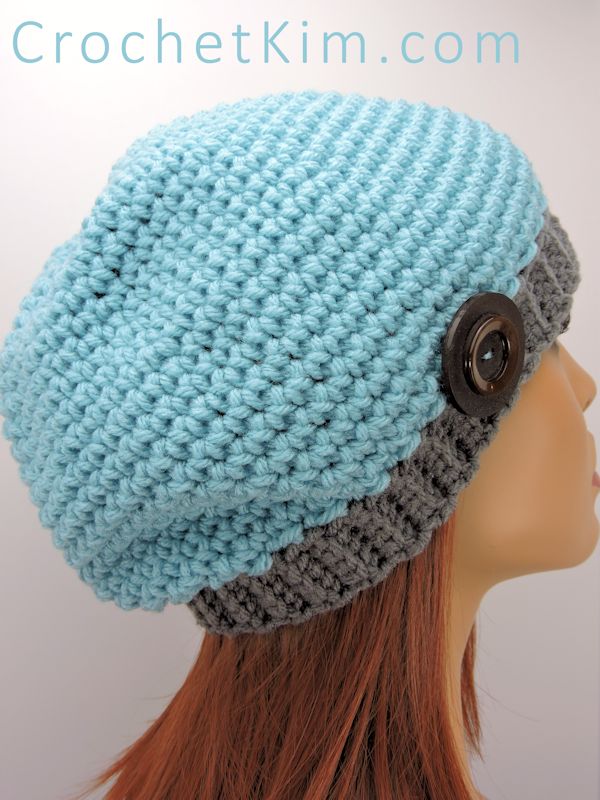
Hat body 26″, brim 19″ (stretchy), height 8.5″
Materials
- Red Heart With Love (aran weight, 100% acrylic), 135 yards total yardage for one hat (not 135 yds of each color):
- Color A: Iced Aqua
- Color B: Pewter
- Suggested hook sizes: L-11 [8mm] (larger hook) and H-8 [5mm] (smaller hook)
- Stitch marker (or small piece of scrap yarn)
- Needle (for weaving ends and seaming brim)
Notes
This is my basic slouchie beanie pattern. It’s just a plain slouchy. You can make stripes, tapestry, cross stitch, whatever you like. Embellish it with beads, buttons, flowers, bows or purchased appliques. This hat is your palette to use your own creativity.
Hat is worked top-down, in unjoined rounds, brim is applied once the hat body is finished.
Each round is worked in spiral fashion, without joining rounds. Use a stitch marker or scrap piece of yarn to mark the last stitch of each round so you won’t lose your place in the round.
I’ve worked this hat in a very loose tension. I prefer to crochet, but I also prefer the drape and feel of knitted projects so, when I’m working on a project that requires that same sort of drape, I use a much larger hook.
You’ve probably worked hats before that didn’t have this kind of drape. Here’s your chance to do something different. Work at a loose tension with the hook that gives you the gauge measurements I’ve indicated. The brim is the exact opposite. You need to work at a very tight tension for the brim. The tighter, the better.
The myth about crochet using more yarn than knitting is just a myth. You will find that, if you concentrate on getting the same drape and feel of a knit hat, you will use less yarn.
Crocheters have been “conditioned” to use smaller hooks because they were only readily-available in those sizes. Now that we have the internet, we have access to a much larger variety of sizes. You can now find 7mm, 8mm, 9mm and 10mm easily and you no longer need to produce stiff fabrics.
This hat uses a total of only 135 yards. You can now produce just as many projects from a skein that the knitters do, without compromising the finished project. Don’t buy into the myth any longer!
Tip
This project is excellent for charity donations!
Gauge
After round 6, approx. 4″
After round 10, approx. 6.5″
After round 14, approx. 9″
Instructions
Rnd 1: With color A and larger hook, ch 2, 4 sc in 2nd ch from hook.
Rnd 2: 2 sc in each sc around: 8 sc.
Rnd 3: 2 sc in each sc around: 16 sc.
Rnd 4: [Sc in next sc, 2 sc in next sc] around: 24 sc.
Rnd 5: [Sc in next 2 sc, 2 sc in next sc] around: 32 sc.
Rnd 6: Sc in each sc around: 32 sc.
Rnd 7: [Sc in next 3 sc, 2 sc in next sc] around: 40 sc.
Rnd 8: Rep rnd 6: 40 sc.
Rnd 9: [Sc in next 4 sc, 2 sc in next sc] around: 48 sc.
Rnd 10: Rep rnd 6: 48 sc.
Rnd 11: [Sc in next 5 sc, 2 sc in next sc] around: 56 sc.
Rnd 12: Rep rnd 6: 56 sc.
Rnd 13: [Sc in next 6 sc, 2 sc in next sc] around: 64 sc.
Rnd 14: Rep rnd 6: 64 sc.
Rnd 15: [Sc in next 7 sc, 2 sc in next sc] around: 72 sc.
Rnds 16-24: Rep rnd 6: 72 sc.
Brim
Row 1: (Still attached to hat, ribbing is worked vertically along stitches of hat.) With smaller hook and color B, ch 6, sc in second ch from hook and in next 4 ch, on hat body sk 1 sc from round 24, sl st in next sc, turn ribbing.
Row 2: Working in back loops only, sc in 5 sc, turn ribbing.
Row 3: Ch 1, working in back loops only, sc in 5 sc, on hat body sk 1 sc from round 24, sl st in next sc, turn ribbing.
Repeat rows 2-3 until all stitches used from round 24, fasten off.
Finishing
With yarn needle, seam Brim. Weave in all ends securely.