
Adding character to your crocheted amigurumi can be as simple as adding a pair of safety eyes and a nose. In this article, we will break down how to place and apply the safety eyes and nose.
Learn more about amigurumi eyes.
The Pieces
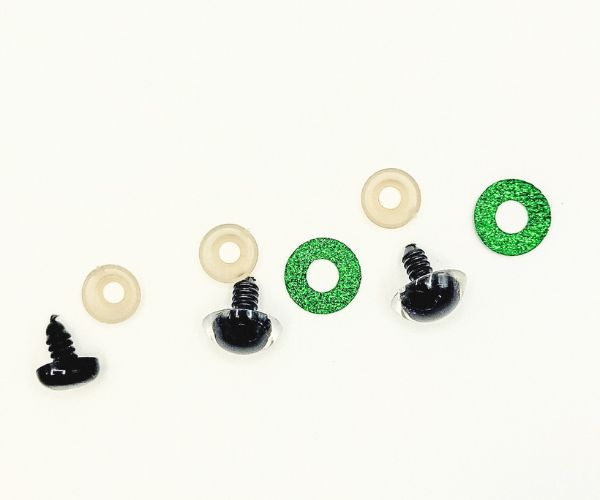
First, make sure you have the appropriate pieces for your safety eyes. This should include the eye, optional colored washer, and safety washer.
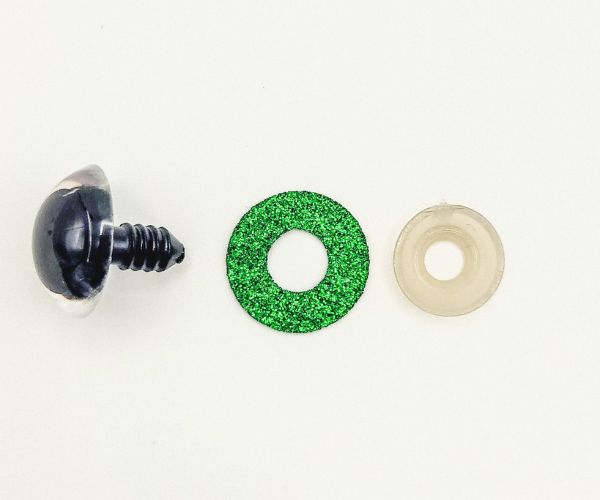
Main Piece
The main piece of the safety eye includes a round eye on a peg. The peg is ridged, which secures the washers in place.
Colored Washer
If you are using a colored safety eye, you will need to add the colored washer onto the peg. Make sure the colored part of the washer faces the eye away from the peg.
Safety Washer
The correct size safety washer should be difficult to get on the peg. The washer needs to be so firmly secured that you will not be able to remove it by hand.
If the washer is even a little too large, the eye is no longer safe for children to handle since it poses a choking hazard.
The Placement
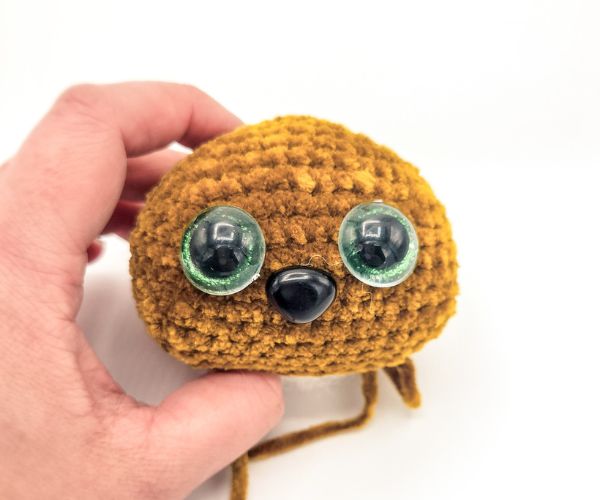
How you place the eyes and nose will depend on the expression you want to create.
Low
Eyes placed low on the face give your character a cute quality. It mimics the large, lower-placed eyes of a young child compared to an adult.
Mid
Placing the eyes toward the middle of the head will give your character a more neutral, mature look.
High
We don’t generally recommend placing the eyes high on the head. It looks unnatural to most people. This might work if you attempt to achieve an odd look but generally avoid high placement.
Close Together
Placing the eyes close together over a nose gives your character a vintage look. This style was popular in older teddy bears and has a lot of charm.
Far Apart
Placing the eyes far apart is a popular look for the very cute style of amigurumi. If you decide on low and far apart, we recommend adding a blushing cheek to the outside corner of the eye for added cuteness.
Application
Most patterns instruct the maker on the placement of the safety eyes. For example, the pattern may state, “Stuff firmly, place safety eyes between rows 10-11.” Use the same technique for both the safety eyes and the nose.
Place The Eyes
First, place the eyes where you think they will look best by inserting the peg on the main piece between the stitches. If you are happy with the placement, continue to the next step. If not, keep experimenting until you find the spot that achieves your vision.
Pro tip:
I like to make as much of the head as possible, then lightly stuff it before placing the eyes. In my experience, the shape of the head is difficult to distinguish clearly before stuffing. I add a light amount of stuffing to determine the final shape, then place my eyes.
Add the Safety Washer
Once satisfied with the placement, slip the safety washer inside the head and press it firmly onto the peg of the main piece.
The safety washer should be difficult to squeeze onto the peg. You know the washer is secure after it has clicked into place a few times. You should not be able to wiggle the eye or the washer at all.
Pro tip:
If adding the washer feels like an impossible task, try using a safety eye jig and soft mallet. The jig holds the washer, so you hammer the eye in with a mallet. Be careful not to damage the eye, though!
Go for it!
Safety eyes provide you with an opportunity to take your crochet amigurumi creatures to another level.
After using this simple guide, you can achieve the proper placement for the features. Have you recently started using safety eyes?
Share with us on social media by tagging CrochetKim on Instagram!