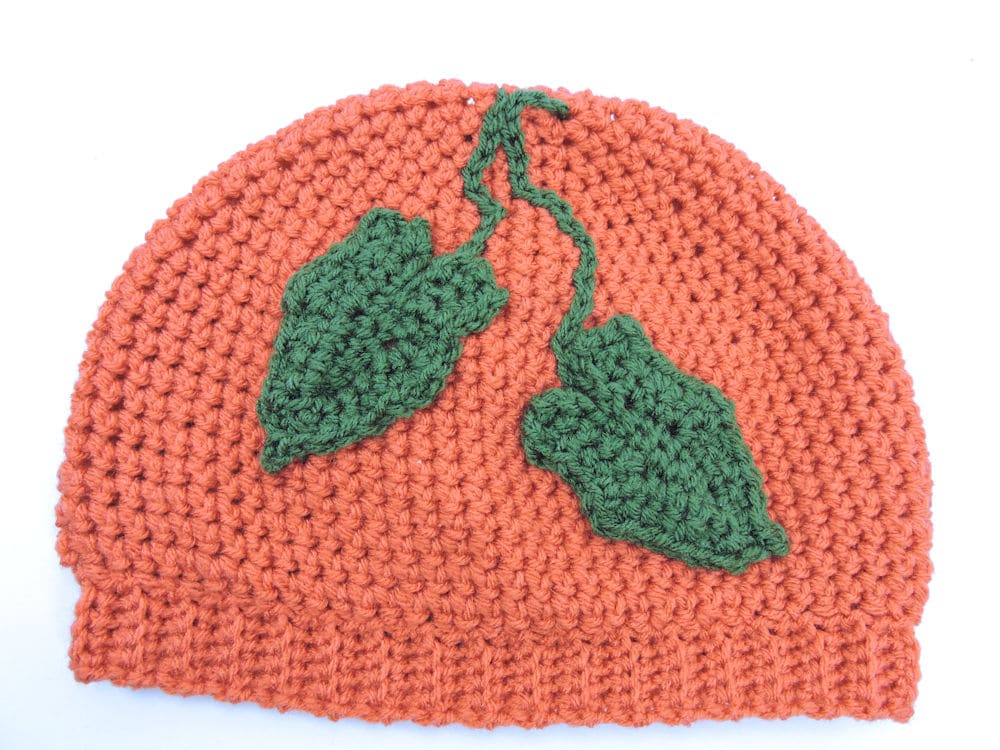
Perfect for the fall season, make this hat full of pumpkin whimsy. Keep warm and cute at the same time!

Pumpkin Patch Hat
designed by Kim Guzman © Sept. 2015
Please read my Terms of Use
Technique: Regular Crochet
Finished size
Hat body 26″, brim 19″ (stretchy), height 8.5″
Materials
- Red Heart Super Saver (aran weight, 100% acrylic):
- Color A: Coral, approx. 135 yards
- Color B: Medium Thyme, small amount
- Suggested hook sizes: L-11 [8mm] (larger hook) and H-8 [5mm] (smaller hook)
- Stitch marker (or small piece of scrap yarn)
- Needle (for weaving ends and seaming brim)
Notes
Hat is worked top-down, in unjoined rounds, brim is applied once the hat body is finished.
Each round is worked in spiral fashion, without joining rounds. Use a stitch marker or scrap piece of yarn to mark the last stitch of each round so you won’t lose your place in the round.
I’ve worked this hat in a very loose tension. I prefer to crochet, but I also prefer the drape and feel of knitted projects so, when I’m working on a project that requires that same sort of drape, I use a much larger hook.
You’ve probably worked hats before that didn’t have this kind of drape. Here’s your chance to do something different.
Work at a loose tension with the hook that gives you the gauge measurements I’ve indicated. The brim is the exact opposite. You need to work at a very tight tension for the brim. The tighter, the better.
I turned this hat inside out before applying the brim. I liked the textured look of the back of the stitches. You can use whatever side you like.
Gauge
After round 4, approx. 3″
After round 6, approx. 4.5″
After round 10, approx. 7″
After round 14, approx. 10″
Crochet Pattern Instructions
Rnd 1: With color A and larger hook, ch 2, 4 sc in 2nd ch from hook.
Rnd 2: 2 sc in each sc around: 8 sc.
Rnd 3: 2 sc in each sc around: 16 sc.
Rnd 4: [Sc in next sc, 2 sc in next sc] around: 24 sc.
Rnd 5: [Sc in each of next 2 sc, 2 sc in next sc] around: 32 sc.
Rnd 6: Sc in each sc around: 32 sc.
Rnd 7: [Sc in each of next 3 sc, 2 sc in next sc] around: 40 sc.
Rnd 8: Rep rnd 6: 40 sc.
Rnd 9: [Sc in each of next 4 sc, 2 sc in next sc] around: 48 sc.
Rnd 10: Rep rnd 6: 48 sc.
Rnd 11: [Sc in each of next 5 sc, 2 sc in next sc] around: 56 sc.
Rnd 12: Rep rnd 6: 56 sc.
Rnd 13: [Sc in each of next 6 sc, 2 sc in next sc] around: 64 sc.
Rnd 14: Rep rnd 6: 64 sc.
Rnd 15: [Sc in each of next 7 sc, 2 sc in next sc] around: 72 sc.
Rnds 16-24: Rep rnd 6: 72 sc.
Brim
Row 1: (Still attached to hat, ribbing is worked vertically along stitches of hat.) With smaller hook, ch 6, sc in second ch from hook and in next 4 ch, on hat body sk 1 sc from round 24, sl st in next st, turn ribbing.
Row 2: Working in back loops only, sc in 5 sc, turn ribbing.
Row 3: Ch 1, working in back loops only, sc in 5 sc, on hat body sk 1 sc from round 24, sl st in next st, turn ribbing.
Repeat rows 2-3 until all stitches used from round 24, fasten off.
Finishing
With yarn needle, seam Brim. Weave in all ends securely.
Pumpkin Leaves (make 2)
The Pumpkin Leaf Applique can be found HERE. With color B, make only the leaves; not the vine bit. You can make as many leaves as you would like. I’ve only made two on this hat.
Finishing
Using yarn needle and B, attach leaves to hat. I used an embroidery chain stitch to make the vining from the leaves to the top of the hat. You can also use surface chain or you could make a chain and attach it to the hat as well.
This is one of my earlier videos and not the quality of my current videos, but it shows how to make a surface chain, if you would like to try it.