While many crocheters enjoy creating free-handed and without patterns, many more enjoy recreating designs by the many talented designers of crochet wear.
However, learning to read crochet patterns can be like learning a new language full of abbreviations and nuance.
But don’t worry, we are here to decipher the code and help you learn to read patterns like a pro. Let’s dive in.
The Anatomy Of a Crochet Pattern
Every quality crochet pattern contains certain information divided into sections to help you get started.
We will use our magical butterfly throw ad-free pattern to illustrate each section below.
Materials
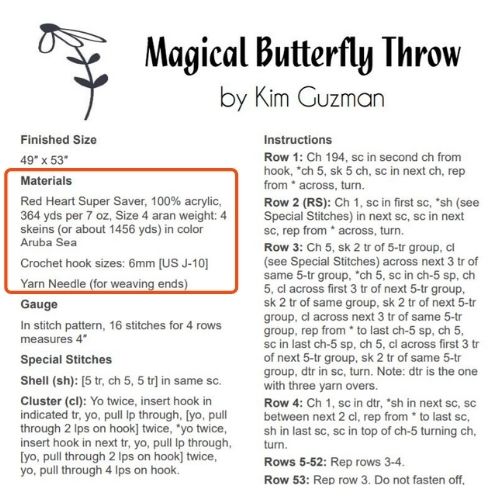
Every pattern includes a comprehensive list of materials that you will need to make the pattern. This usually includes the type of yarn and amount of yarn needed, the hook size recommended, and any additional materials.
Yarn selection
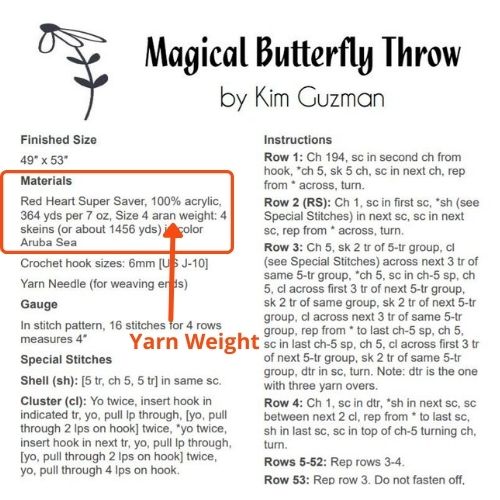
Patterns often list the exact yarn brand, color, and yardage needed.
Many patterns also include the yarn weight used for the pattern so you can select a different yarn brand or shop your stash. One example is worsted weight yarns.
Note: Yarn weights are labeled differently in the US and UK. Check out the handy chart below for a comparison.
Yarn Weights US vs UK
Download this table as a printable.
Hook size
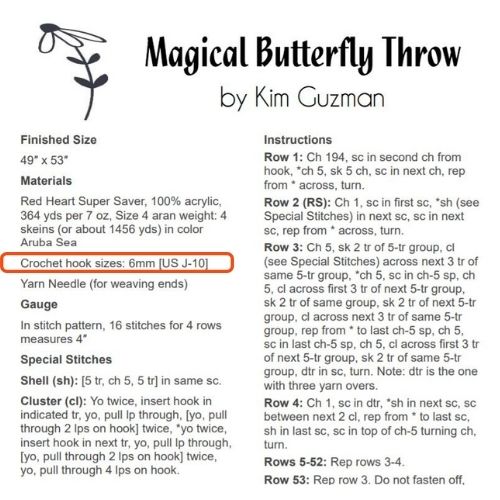
The designer of the crochet pattern will list the exact hook size used to make the product.
Please keep in mind that you might naturally stitch tighter or looser than the original designer and might need to choose a larger or smaller hook to get a similar effect. Read more about this in the gauge section below.
Additional supplies
Of course, you will need some quality crochet scissors and a yarn needle to weave in ends, but you might also need to make tassels, use a lucet fork, or a pom pom maker. This section of the pattern will help you prepare for every possible thing you will need.
Gauge
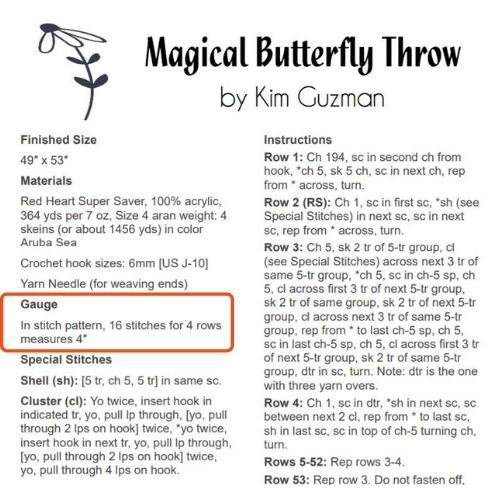
Many patterns include a gauge guide. A gauge swatch is a small crocheted square using the stitches in the pattern.
Once you make the swatch, you will measure to make sure your tension (the tightness or looseness of your stitches) matches that of the designer. Having a proper gauge will ensure that the finished item is the right size.
Gauge adjustments
If you find your swatch is too big, use a smaller hook and try again. If your swatch is too small, use a larger hook.
While making a gauge swatch can be time-consuming and tedious, it is less obnoxious than not being able to wear the beautifully crocheted sweater you finished.
Read more about gauge in crochet.
No gauge listed
Not all patterns require a gauge swatch. Wearables, like sweaters and hats, need to fit a certain size to be usable.
Many other items, like blankets and stuffed animals, don’t have to fit a body. Some patterns do not include a gauge guide, since the pattern doesn’t need to be a certain size.
Stitches and Terms
A great way to know if you have the skills to make a pattern is to consult the stitches and terms section. Not only will it provide you with a complete list of techniques needed to make the item, it will also provide the abbreviations used in the pattern to indicate the stitches.
U.S. vs. U.K. terms
Most patterns indicate if they are written in U.S. or U.K. terms. Both use the same terms in general, but they refer to different stitches. If you are familiar with one set of terms, but the pattern uses the other, use this cheat sheet to help you translate the terms.
Crochet Stitch Terms US vs UK
Download this table as a printable.
Note: All patterns on CrochetKim use US terms.
Abbreviations
Don’t worry, you don’t need to know all the abbreviations for all the stitches! In fact, I don’t recommend spending time memorizing them.
If you come across one in the pattern you can’t remember, just look back to the stitches and terms to refresh your memory.
Read all about crochet abbreviations here. (With downloadable cheat sheet.)
Stitches
The list of stitches will probably include many you know and some you don’t. When you find a stitch you aren’t familiar with, simply put the name of the stitch into YouTube to find a tutorial or check out our stitch library here.
This section will also give you the shorthand abbreviations the pattern will use to indicate when to use which stitch.
Special Stitches
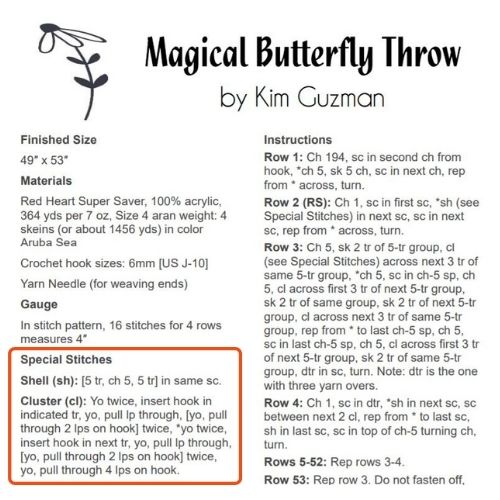
Some patterns include unique or less commonly used stitches. These will be labeled as special stitches. This section details what the special stitches are called, their abbreviations, and how to make each stitch. Some patterns include illustrations, while some will give worded instructions for the stitches.
Notes
Always read the notes before starting a pattern! The notes section includes important details, like what different symbols in the pattern indicate, any special instructions needed, as well as construction techniques or schematics used in the pattern.
Rounds or Rows
Most patterns are written in rounds (working in a circle) or in rows (working back and forth).
You will always turn at the end of each row, but some patterns with rounds are turned while others are not. Always check the pattern for specific details.
Repeats

In order to word patterns in the shortest, most efficient way, most patterns indicate repeats instead of writing out each stitch over and over again. Repeats are often indicated with asterisks or parentheses.
Construction Techniques
If the pattern requires seaming or assembly, the instructions will be included in this section briefly and in more detail later in the pattern.
Copyright
A statement of copyright is often included in the notes of most patterns. Remember, all crochet patterns are protected by copyright and should not be shared or sold without the permission of the designer.
The Pattern
Remember to always start with a simple pattern, if you haven’t worked from a pattern in the past. You can always work your way up as you get more comfortable reading crochet patterns.
Read through it
Try to read through the pattern at least once before you start making it to familiarize yourself with the layout of the pattern.
You don’t have to read every word but look for details like what your turning stitches will be, how many rows of each color you might be making, what stitches are in what order. Pay attention to those details.
Highlight it
As you read through your pattern, have a highlighter ready. If you are making a pattern with sizes, highlight the stitch counts and row counts for the size you are making to avoid confusion while you are working.
Also highlight any details that you want to pay extra attention to, like color changes and special stitches.
How to read it
Start at the first row and create each stitch as it comes up. If you struggle to understand what an abbreviation means, refer back to the Stitches and Terms. It really is as simple as reading through and just doing it one stitch at a time.
Get help
If you continue to struggle with understanding the pattern, reach out to the designer! The contact information is included in most patterns. Designers want you to have the best experience possible with their patterns, so always feel free to reach out.
Illustrations
Some patterns include the illustrations in the pattern while others put them on a separate page. Referring to the illustrations can greatly help you visualize the stitches and how they will all look together.
Types of Crochet Patterns
In my experience, patterns are written in three different formats. While they don’t have official names, I call them standard patterns, lace patterns, and graph patterns.
Standard Patterns
Start with a standard pattern. This is anything made with simple stitches forming simple shapes.
Most sweaters, hats, pillow covers, blankets, kitchen or bath accessories are written in this way. Each stitch is written out and accounted for in a standard pattern.
Check out these standard crochet patterns.
Lace Patterns
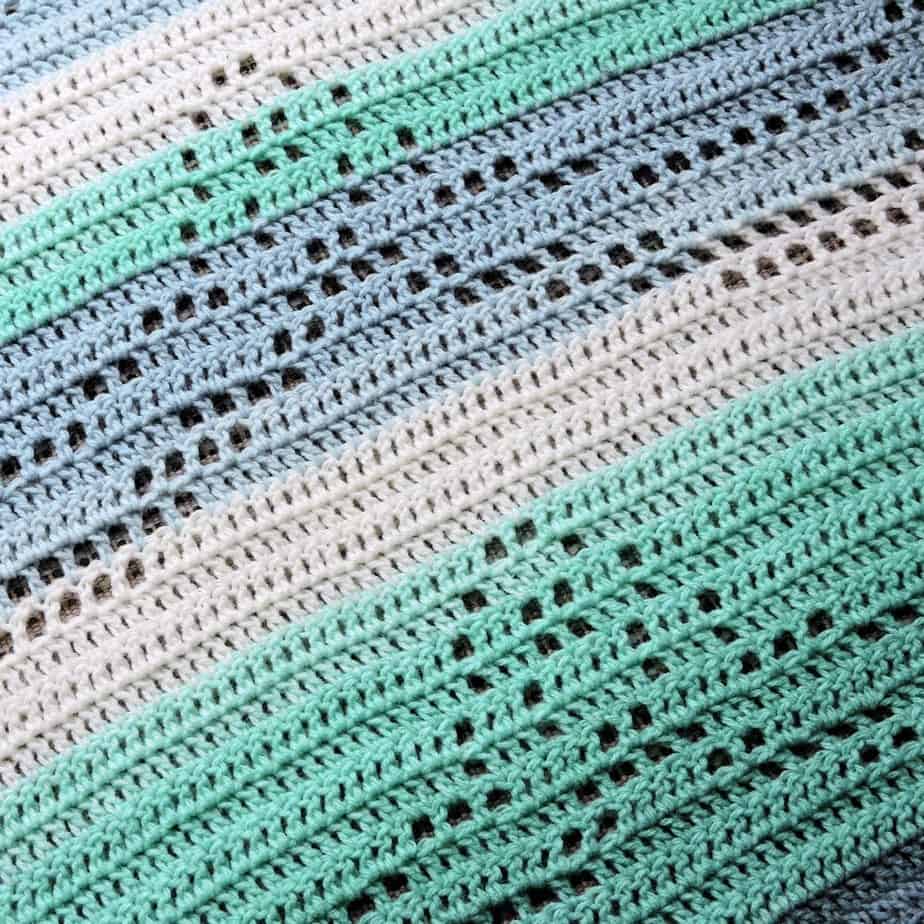
Lace is characterized by open spaces and an airy texture in the stitches. Patterns written using a lace technique are things like doilies, some table runners, some curtains, some shawls.
Since lace patterns make large holes, most patterns don’t always write out which stitches to skip. They only detail which stitches to work into. This can be confusing if you are used to each stitch being accounted for, like in a standard pattern.
My personal favorite lace designer is Grace Fearon.
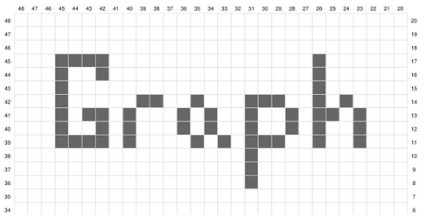
Graph Patterns
Graph patterns break pattern writing down to its most simple form. Instead of including written instructions, a visual graph is provided.
Colorwork Graph
A colorwork graph is often included in projects that illustrate a picture, like a corner to corner blanket with flowers on it. This graph includes squares that are colored in to indicate which stitches are made in which color.
This is an example of a Colorwork Graph.
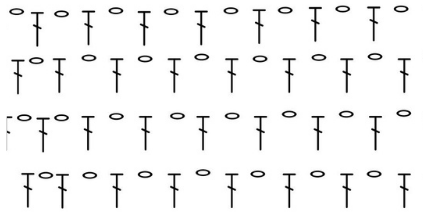
Stitch Graph
A stitch graph is commonly used to write patterns around the world, since it skips the U.S. vs U.K. terms confusion.
Each stitch is illustrated by a symbol and you simply work each symbol in the order indicated to create the pattern. These graphs rarely include other details for the pattern and can be quite challenging to work from. Read our guide to crochet symbols.
This is an example of a Stitch Graph.
Patterns To Start With
Starting with a simple pattern worked in rows is usually best. I recommend starting with a blanket or beanie pattern.
Blankets
Try this elegant pattern if you are new to making blankets. The simple repeating pattern is easy to follow and gives a satisfying result.
Sweaters
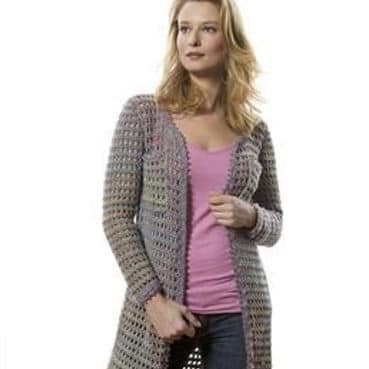
A simple sweater pattern is made in rows then assembled at the end. Each section of the pattern is easy to follow and makes for a beautifully finished garment.
Beanies
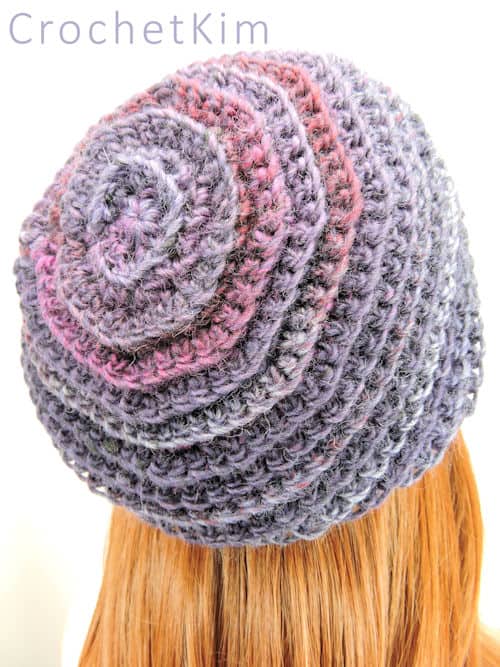
Simple beanies are a great place to start reading patterns that are written in the round. This crochet pattern is perfect for beginners.
Scarves
Making a simple scarf will get you started reading patterns, but they are also a wonderful method to grow your reading skills. Try this elegant lace scarf pattern if you are ready to level up your skills.
Dish Cloths

The ultimate beginner pattern, try your hand at something small that works up quickly. A dishcloth is not only an incredibly practical first pattern, it’s also the easiest. Dishcloth pattern.
Where To Find Patterns
The best place to find a pattern is from independent pattern designers, but until you find the designers you love the most, start on a few of these popular pattern sites.
Ravelry
One of the most popular sources for patterns, you can refine your pattern search by craft, yarn weight, pattern style, and so much more. You need a free account to download the patterns.
Visit Ravelry | Visit CrocheKim on Ravelry
Etsy
A popular site for crochet patterns, you have the option to favorite shops that sell patterns you enjoy, so you are notified when new ones become available.
LoveCrafts
Independent designers and brands upload many patterns to LoveCrafts. With their vast options, you are sure to find the perfect one.
Independent designer websites
I highly recommend signing up for email newsletters from your favorite crochet pattern designers. You can easily find designers using the websites above. If a designer has a website, it will be on the pattern.
Now Get Started!
Equipped with our top tips for reading patterns and loads of resources on how to find them, you can now try out new techniques.
Crocheting by following a pattern can be very fulfilling as you watch your creation take shape.
Don’t forget to check out all the free crochet patterns and stitch tutorials here on our website.