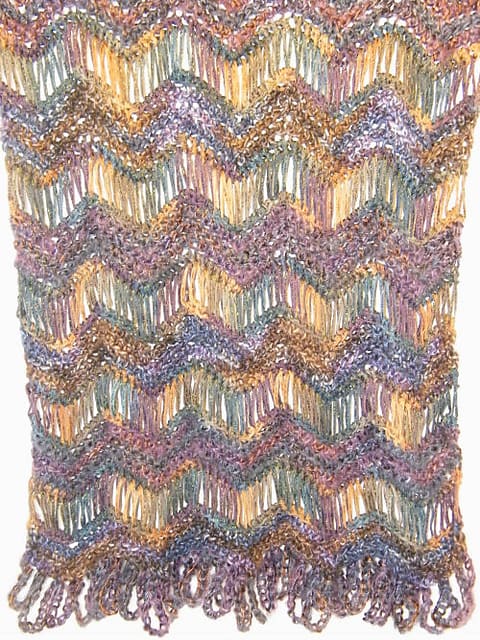
Maya Wrap
designed by Kim Guzman © Oct. 2010
Please read my Terms of Use
Technique: Broomstick Lace Variation Crochet
Finished Size
approx. 51” wide and 15” high, as worn (easily altered by adding rows or increasing /decreasing stitches)
Materials
Any worsted to aran to slightly larger yarn can be used for this project. Try it with 3 different yarns as shown or try it with one color and yarn throughout. Any type of yarn can be used for your own unique work of art. Textured, mohair, beaded, sequined, smooth, metallic. Use your imagination!
A: Prism Yarns, Indulgence, 2 hanks/184 yds
B: Prism Yarns, Pearls, 3 hanks/315 yds
C: Prism Yarns, Kid Slique, 2 hanks/176 yds
Suggested crochet hook size: Size 5.5mm [US I-9]
Size 50 broomstick pin or knitting needle
Gauge
In stitch pattern, 17 sts measures 4”
Abbreviations
ch=chain; lp(s)=loop(s); mm=millimeters; oz=ounces; rem=remaining; rep=repeat; RS=right side; sc=single crochet; sk=skip; sl=slip; st(s)=stitch(es); yds=yards; yo=yarn over
Pattern Notes
Note that the top of each stitch has two loops that form a little oval. When a pattern indicates you will crochet into the front loop, it is meant that you crochet under only the loop closest to you. It may or may not mean the actual front loop of the stitch itself. For the back loop, it is the loop furthest from you.
TIP: If your last stitch is too “loopy” because of working through only one loop, work your last stitch normally, under both loops.
The stitch pattern is a multiple of 13, plus 12. To increase or decrease in width, add to or subtract from the initial chain in multiples of 13.
The knitting needle is only used to maintain the height of the stitches. If you don’t have a knitting needle, try using anything you may have in your household which is about 1″ diameter. You can use a ruler, turkey baster, candle, or even a piece of cardboard.
Video Support
This video demonstrates the broomstick lace variation to create drop stitches. It does not demonstrate the entire project. The videos show “anchored” drop stitches. They include a chain at the bottom. The pattern doesn’t include this chain at the bottom of the drops.
After I designed the Maya Shawl, I discovered that the drops shifted around and the strands wouldn’t stay uniform. I discovered that I could anchor the drops with this chain method and I highly recommend it. You don’t have to use it, but it really does make a big difference. Right-Handed | Left-Handed
Crochet Pattern Instructions
Row 1: With A, ch 64, sc in second ch from hook and in each of next 4 ch, *3 sc in next ch, sc in each of next 5 ch, sk 2 ch, sc in each of next 5 ch, rep from * to last 6 ch, 3 sc in next ch, sc in each of next 5 ch, turn.
Row 2 (RS): Ch 1, working in front loops throughout, sk first sc, sc in each of next 5 sc, *3 sc in next sc, sc in each of next 5 sc, sk 2 sc, sc in each of next 5 sc, rep from * to last 7 sc, 3 sc in next sc, sc in each of next 4 sc, sk sc, sc in last sc, turn.
Row 3: Rep row 2, changing to B on final st.
Row 4: With B, rep row 2, except do not turn after final st.
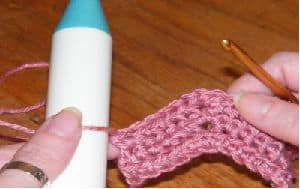
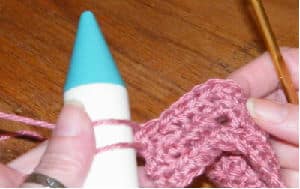
Row 5: (Image A) Pull up slightly on last lp on hook and place it on broomstick pin. (Image B) Sk first sc, * insert hook in back loop of next sc, yo, pull lp through and onto broomstick pin. (Image C). Rep from * across—65 lps on broomstick pin.
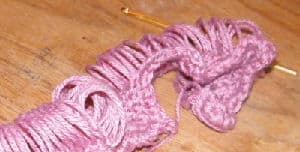
Row 6: Carefully remove all lps from broomstick pin (Image D), insert hook in first lp, yo, pull yarn through, ch 1, sc in first lp from pin and each rem lp, changing to C on final st.
Rows 7-9: Rep row 2, changing to B on final st.
Rows 10-12: Rep rows 4-6 changing to A on final st.
Rows 13-15: Rep row 2, changing to B on final st.
Rep rows 4-15 consecutively 6 times more (or to desired length), on final row, change to C on final st.
Embellishment
With C, ch 15, sk first and 2nd st, sl st in next st, *ch 15, sk 1 st, sl st in next st, rep from * to end. Fasten off.
Opposite End
Join C with sl st at base of row 1, working in unused lps, rep Embellishment.
Finishing
Block as desired. Weave in all ends carefully.


