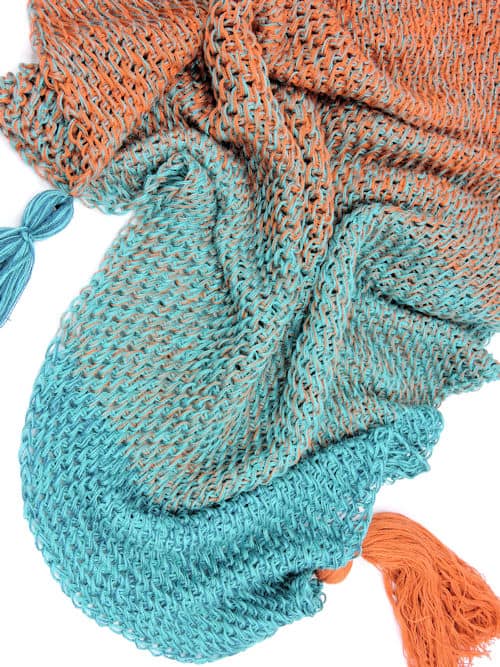
Combining these colors with the fluid movement of the stitch pattern made me think of mermaids in the sun.
This stitch pattern is easy to learn and quick to stitch in Tunisian crochet. Add the tassels for the look so popular right now. Only one cake of yarn is required to make this beauty.
Pin it for Later: https://www.pinterest.com/pin/115827021659712226/
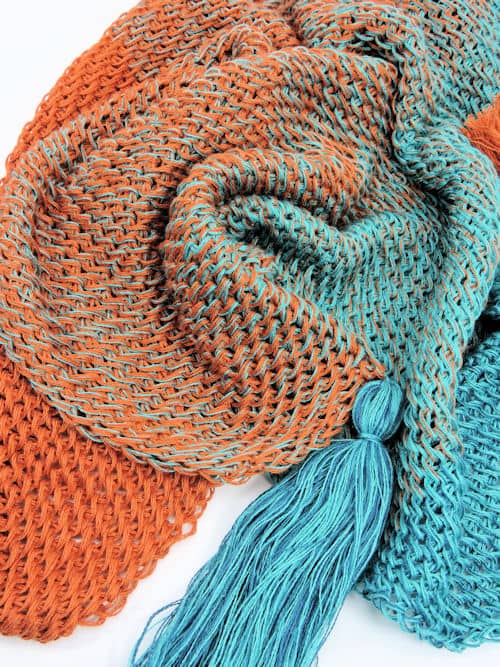
Mermaid Isle Scarf
by Kim Guzman © Apr. 2017. All rights reserved.
Please read my Terms of Use
Technique: Tunisian Crochet
Materials
- Ice Yarn’s Fine Cotton Cake, 100% cotton, fine (#2 weight), 656 yds per 150g (Note: this yarn is discontinued, alternatives include Red Heart It’s a Wrap and Cotton Kings Sultan)
- 6mm Tunisian Hook, 10″ or 14″ length can be used, cabled hook is unnecessary unless preferred
Finished Size
25″ high by 48″ long at widest points
Gauge
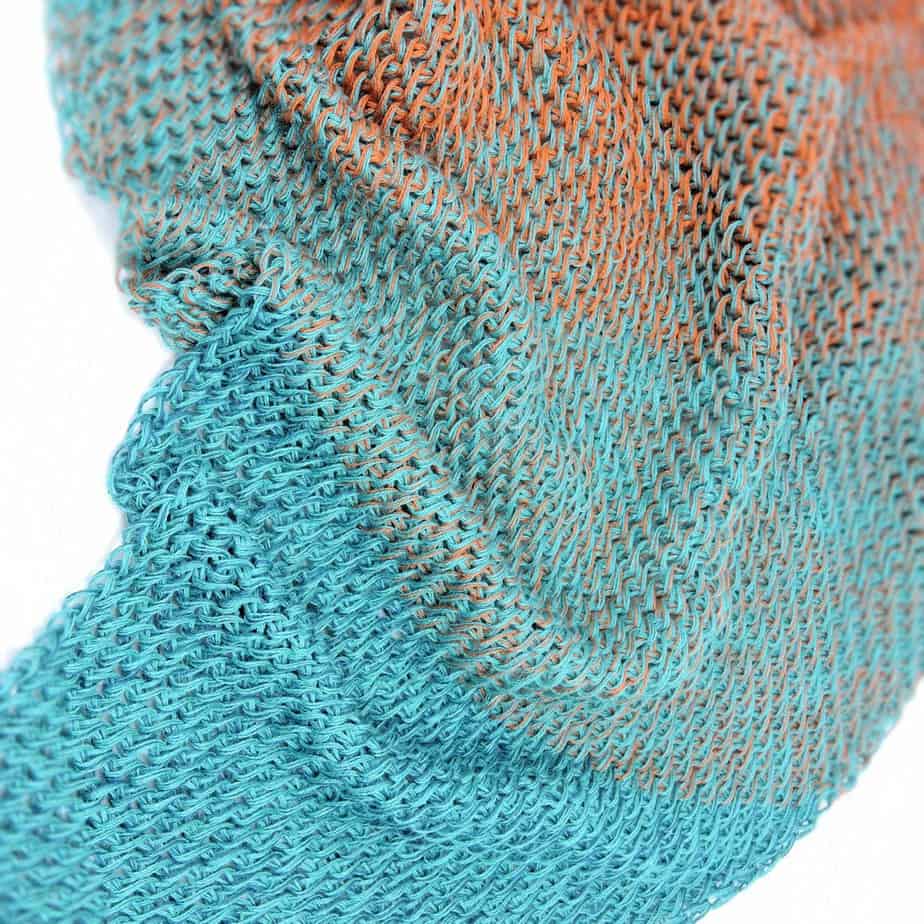
11 sts = 4″; 13 rows = 4″
Special Stitches
Tunisian Full Stitch (tfs): Insert hook from front to back, *between* the stitches, under the top horizontal bar, yarn over, pull loop through. Right-Handed Video | Left-Handed Video
The video teaches how to do the stitch. It doesn’t show the project. You will need to follow the pattern for the project.
You might also like: 12 Free Crochet Scarf Patterns to Keep You Warm
Notes
This is a gradient yarn that starts with one color and progresses to a contrasting color on the opposite end. In order to get a tassel in the contrasting color on the opposite end, you should start your project by making one tassel from the end where you will start. If you simply start your project, you won’t have that color when you get to the end.
When making the tassels, wrap the yarn around anything you feel like will give you a nice length. I wrapped the yarn around approximately 60 times to give the look in the photos. I used a “Wet Ones Big” canister.
The finished scarf is sort of an almond shape. You start at one point, increase every row until you reach about 25″ wide, work without increasing for about 3 or 4″, then decrease every row back to the point. The center of the long edge isn’t a point. When you put a tassel in that position, though, it forms a point due to its weight.
This project has a normal Tunisian crochet closing of: ch 1, [yo, pull through 2 lps on hook] across. When instruction says to close normally, use this closing.
When you see “skip first vertical bar” in the instruction, the first vertical bar is the one that has a loop in it from the closing.
Instructions
Row 1:
A: Ch 2, insert hook in second ch, yo, pull lp through: 2 lps on hook.
B: Ch 1, yo, pull through 2 lps on hook.
Row 2:
A: Sk first vertical bar, insert hook in space between first and last st, yo, pull lp through, insert hook under 2 outer vertical bars of last st, yo, pull lp through: 3 lps on hook.
B: Ch 1, [yo, pull through 2 lps on hook] across.
Note: The following row increases the stitch count by one stitch. This increase continues until the center of the scarf.
Row 3: Sk first vertical bar, tfs to last st, insert hook under 2 outer vertical bars of last st, yo, pull lp through: 4 lps on hook. Close normally.
Rows 4-69: Rep row 3. (70 lps on hook on final row)
Note: The following two rows are repeated in order to maintain stitch count with no increasing.
Row 70: Sk first and next vertical bars, tfs to last st, insert hook under 2 outer vertical bars of last st, yo, pull lp through: 70 lps on hook. Close normally.
Row 71: Sk first vertical bar, tfs to last 2 sts, sk 1 st, insert hook under 2 outer vertical bars of last st, yo, pull lp through: 70 lps on hook. Close normally.
Rows 72-87: Rep rows 70-71.
Row 88: Rep row 70 once more.
Note: The following row decreases the stitch count by one stitch. This decrease continues to the end of the scarf.
Row 89: Sk first and next vertical bars, tfs to last 2 sts, sk 1 st, insert hook under 2 outer vertical bars of last st, yo, pull lp through: 69 lps on hook. Close normally.
Rows 90-154: Rep row 89. (4 lps on hook on final row)
Row 155: Sk first and next vertical bars, 1 tfs, insert hook under 2 outer vertical bars of last st, yo, pull lp through: 3 lps on hook. Close normally.
Row 156: Sk first and next vertical bars, insert hook under 2 outer vertical bars of last st, yo, pull lp through, yo, pull through both lps on hook. Fasten off.
Finishing
Note: If you would like to wet block your project, you will want to do it before attaching tassels.
Make two more tassels. Attach tassels to the ends and in the center of one long edge. Make another tassel to attach along the other long edge, if you want. Weave in all ends carefully.
You might also like: 12 Beautiful Beanie Hats