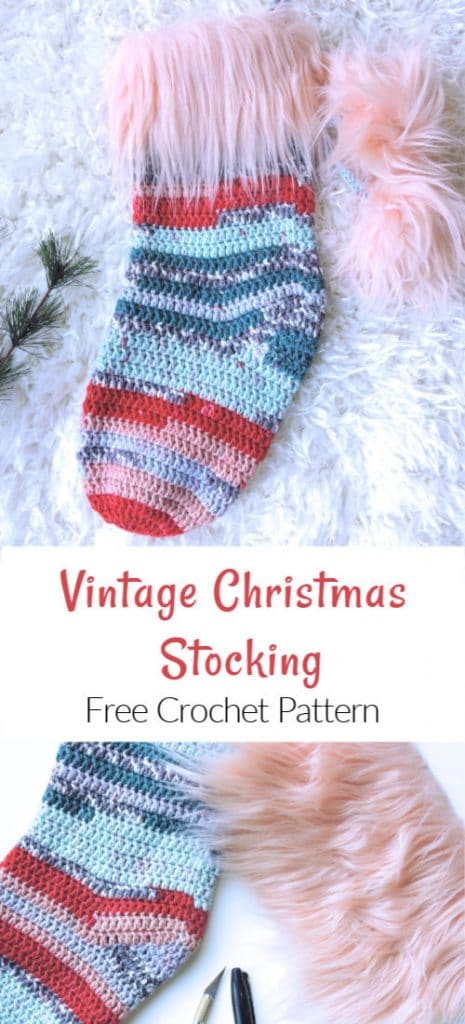
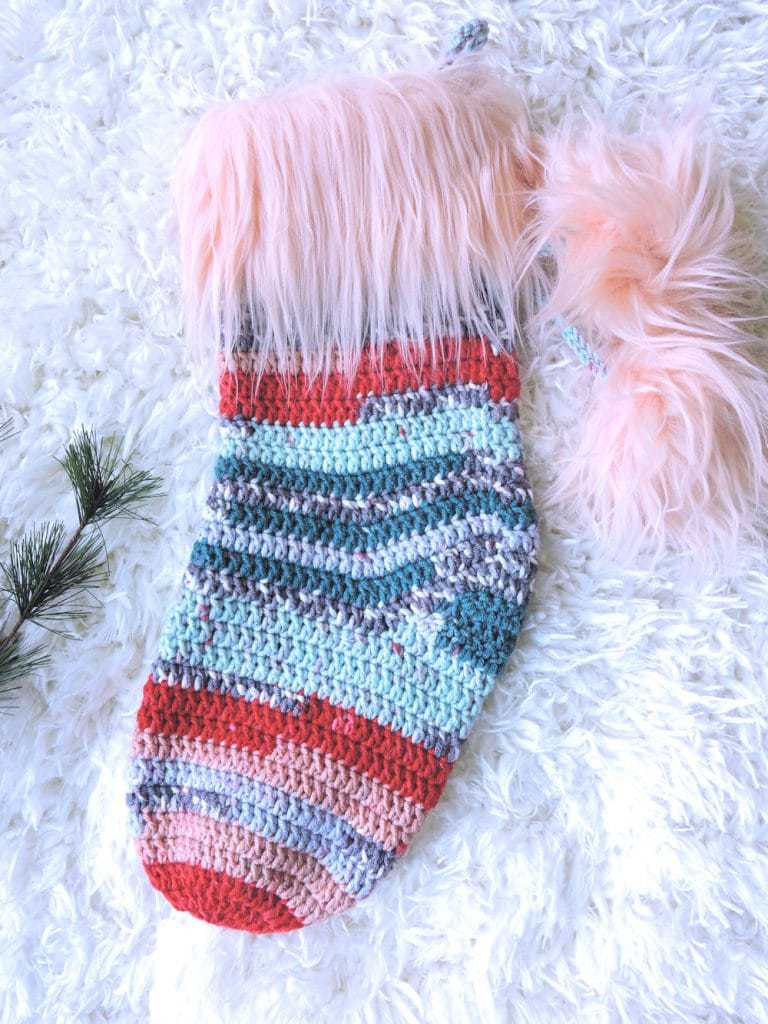
I didn’t expect this striping yarn to have such an antique Christmas feel but as soon as I started stitching it up, it screamed that it wanted to be Christmas stockings!
I paired it with a luxurious faux fur long pile fabric in pink blush with a cuff around the top and two faux fur poms.
We also have a matching Christmas scarf pattern.
Vintage Christmas Stocking
designed by Kim Guzman © Oct. 2019
Please read my Terms of Use
Technique: Regular Crochet
Finished Size
With cuff, 15″ from toe to top, 5″ flat measurement across top (without cuff)
Materials
- James C Brett’s “Fairground DK“, 100% premium acrylic, 252 yds per 100g, color shade G7: 150 yds used for one stocking or similar.
- Suggested hook: H-8/5mm
- Needle (for weaving ends)
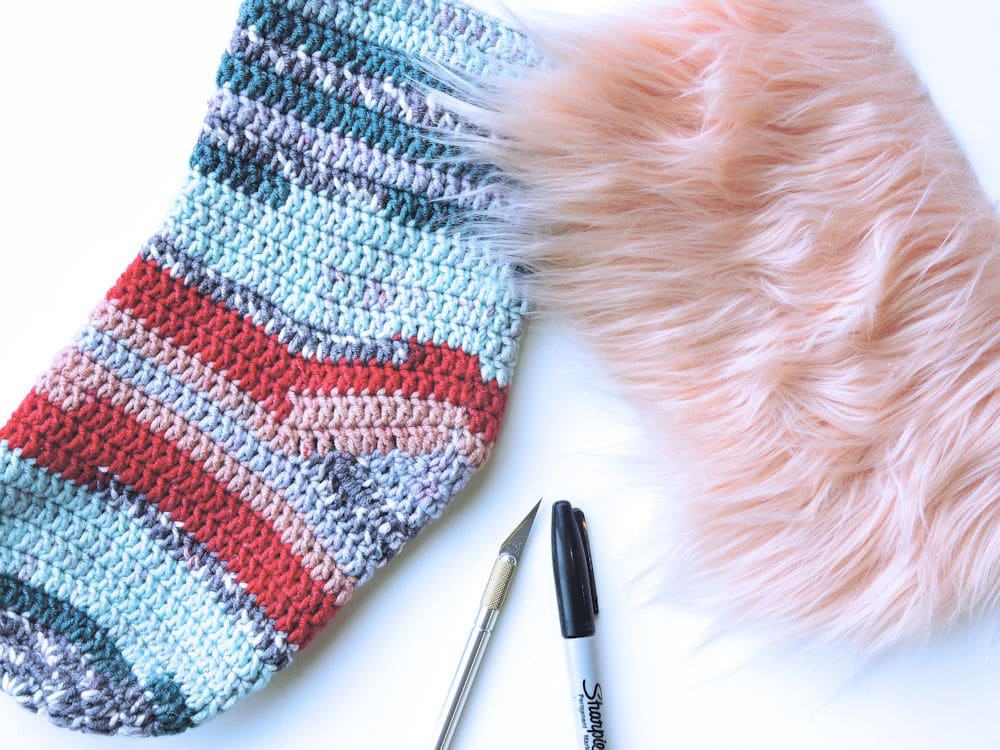
- 1/2 yd long pile faux fur
- Straight Ruler
- 4.5″ template (I used a bowl)
- Magic marker
- Craft knife
- Strong sewing thread (like quilting thread)
- Sewing needle
- Cotton balls
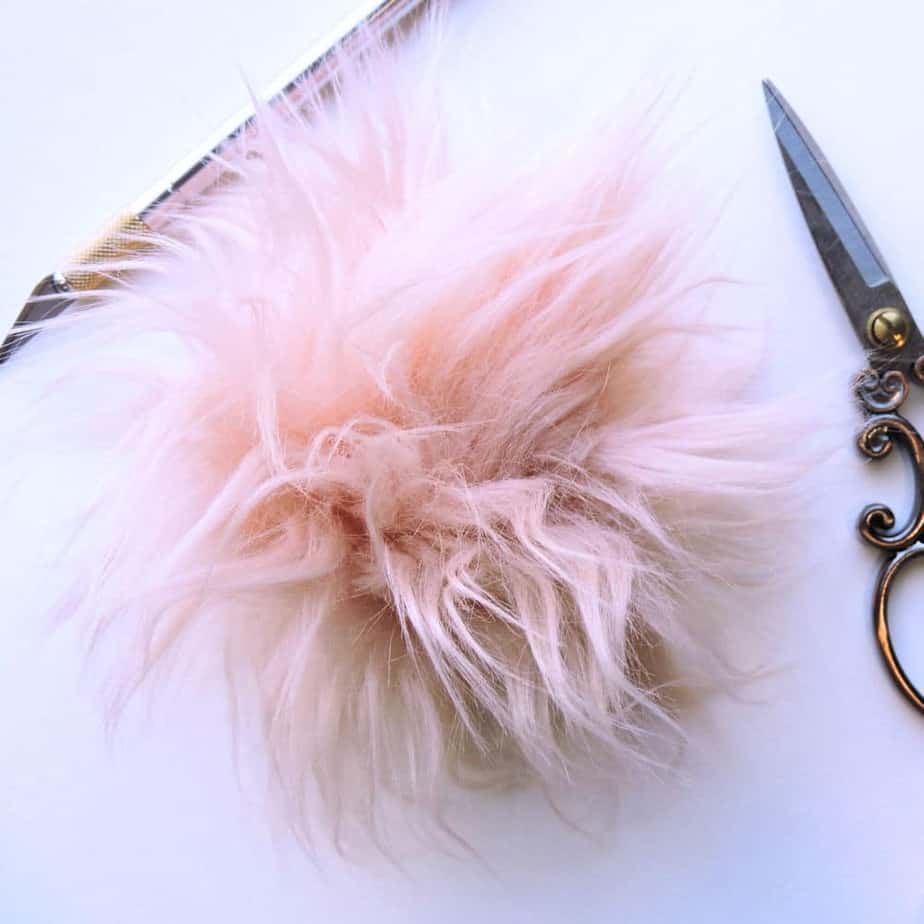
Faux Fur Pompoms and Cuff
I really wanted a specific color for the cuff and pompoms for this project. For that, I decided that I would have to break down and make the faux fur pompom myself instead of buying it ready made.
I used the tutorial from The Crochet Dude and I encourage you to give it a try. It was my first time and it turned out to be incredibly easy. Don’t let it scare you.
If you would prefer to buy it, this is a good option on Amazon.
Notes
This stocking is made from the toe up, in the round.
The stocking is intended for decorative purposes only. In order to use it to hold small gifts, you would need to add a fabric lining.
Gauge
Worked in the round, 18 dc for 10 rounds measures 4″
Special Stitches
Double Crochet Two Together (dc2tog): Yarn over, insert hook in stitch indicated, yarn over, pull loop through, yarn over, pull through 2 loops on hook, yarn over, insert hook in next stitch, yarn over, pull loop through, yarn over, pull through 2 loops on hook, yarn over, pull through 3 loops on hook.
Crochet Pattern Instructions
Stocking is worked from the toe up, in the round. The initial chain does not count as a stitch.
Toe
Round 1: Ch 3, 12 dc in third ch from hook, sl st to first dc: 12 dc.
Round 2: Ch 2 (does not count as a stitch, here and throughout), 2 dc in each dc around, sl st to first dc: 24 dc.
Round 3: Ch 2, [1 dc in each of 2 dc, 2 dc in next dc] around, sl st to first dc: 32 dc.
Round 4: Ch 2, [1 dc in each of 3 dc, 2 dc in next dc] around, sl st to first dc: 40 dc.
Round 5: Ch 2, [1 dc in each of 4 dc, 2 dc in next dc] around, sl st to first dc: 48 dc.
Rounds 6-13: Ch 2, 1 dc in each dc around, sl st to first dc: 48 dc.
Heel
Begin working in rows.
Row 1: Ch 2, dc2tog (see Special Stitches above), 1 dc in next 16 dc, dc2tog, turn: 18 dc.
Row 2: Ch 2, dc2tog, 1 dc in next 14 dc, dc2tog, turn: 16 dc.
Row 3: Ch 2, dc2tog, 1 dc in next 12 dc, dc2tog, turn: 14 dc.
Row 4: Ch 2, dc2tog, 1 dc in next 10 dc, dc2tog, turn: 12 dc.
Row 5: Ch 2, dc2tog, 1 dc in next 8 dc, dc2tog, do not turn: 10 dc.
Cuff Set Up
Begin working in rounds.
Round 1: Tip slightly to work along sides of rows of Heel, ch 2, 2 dc in side of each dc of next 5 rows of Heel (10 dc), dc2tog, 1 dc in each of next 24 dc, dc2tog, (26 dc) 2 dc in side of each dc of next 5 rows of Heel (10 dc), 1 dc in each of 10 dc along top of Heel (10 dc), sl st to first dc: 56 dc.
Round 2: Ch 2, 1 dc in each of 10 dc, dc2tog, 1 dc in each of 22 dc, dc2tog, 1 dc in each of 20 dc, sl st to first dc: 54 dc.
Round 3: Ch 2, 1 dc in each of 10 dc, dc2tog, 1 dc in each of 20 dc, dc2tog, 1 dc in each of 20 dc, sl st to first dc: 52 dc.
Round 4: Ch 2, 1 dc in each of 10 dc, dc2tog, 1 dc in each of 18 dc, dc2tog, 1 dc in each of 20 dc, sl st to first dc: 50 dc.
Round 5: Ch 2, 1 dc in each of 10 dc, dc2tog, 1 dc in each of 16 dc, dc2tog, 1 dc in each of 20 dc, sl st to first dc: 48 dc.
Rounds 6-15: 4 Ch 2, 1 dc in each dc around, sl st to first dc: 48 dc, fasten off. With yarn needle, weave in ends securely.
Faux Fur Cuff
Make sure that your fabric is in the direction you want for the cuff. You don’t want the pile to go side to side, for instance. You want it to go in a downward direction.
Measure the top of your stocking. It should be a flat 5″ measurement, but you could be off slightly with tension. Double that number and add about .75″ to the measurement and that will be your length to go around the top of the cuff. The height of the cuff is 5″ which is a doubled measurement so the cuff folds inside.
Using a magic marker, mark the back of the fabric with the length and height. Cut out the rectangle with the craft knife. You don’t want to use scissors for this. You will end up cutting the pile of the faux fur and you will have puffs and bits everywhere.
Using sewing needle and sewing thread, sew the fabric to the top of the cuff, with a little overlapping to the front of the stocking, making sure that the pile is in the downward direction. After seaming all the way around, fold the top of the cuff inside and seam the ends together. The weight and texture of the fabric will keep the cuff inside.
Make Hanging Loop and Fake Ties
Ch 20, sk 1 ch, sl st in each remaining ch across, sl st to first sl st, fasten off. Weave in ends. Attach ring to inside top of Cuff with sewing thread.
Attach yarn with sl st to one of the dc, under the pile of the faux fur, directly below the hanging loop, ch 10, sk 1 ch, sl st in each remaining ch across (first fake tie made), sl st to same dc, ch 20, sk 1 ch, sl st in each remaining ch across, (second fake tie made), sl st to same dc, fasten off. Weave in ends.
Faux Fur Pom Poms
Use the tutorial from The Crochet Dude for more details.
Make 2. Working from the back of the fabric, using the template, draw a circle with the magic marker. Use the craft knife to cut around the circle. Using a sewing needle and sewing thread, lightly baste around the the circle, about 1/4″ from the edge, cut off thread. Place about four cotton balls in the center and cinch the ends of the threads carefully to close up the pom pom. Secure. Attach pom poms to ends of Fake Ties.
Pin It